|
The software I work with:
There are many 3D programs on the market, two of these are Poser and DAZ Studio.
Both programs follow a similar concept: They offer libraries with ready-made content, and users can load these items and make an image or an animated movie. It means arranging the elements as if it were for a photo shooting. That means choosing the protagonists, selecting their clothing and the objects they are handling, deciding on hairstyles and make-up, setting up body poses, arranging a background scene, setting up the lighting, choosing a camera angle and sometimes also adding special effects like fire, fog or other weather phenomenons.
The computer then calculates where the light rays from a given light source meet the object's surface and that data generates an image - just like taking a photo. This calculation process is called "rendering".
I create add-on files for these programs. This content shows up in the software library and the users can load and use it. My products are available in various stores on the Web. My specialities are historical and fantasy clothing, objects and clothing in toon style and objects in general.
Who buys that stuff?
The users of aforementioned 3D programs. Mostly they are hobbyists who like being creative and who have discovered the computer as the medium of their choice. Just like other people paint with oil paints or embroider tablecloths. The licence for my 3D objects also allows commercial use, so whoever wants to can also use my work in advertising or book illustrations.
Some people may think that just loading pre-made elements is a bit simple, which is why so-called "real artists" look down on this type of creativity. But it always depends on the user's skill. Even if an oil painting is done with the most expensive brushes and paints that doesn't guarantee that the result will be a great artwork. Similarily, using ready-made content doesn't automatically mean that the result is without artistic merit. After all, photographers don’t build their models themselves either, they take photos of existing people or things. But who would deny that photos can be art? Who knows how to use the software and is gifted with creativity can give new originality to the pre-made items. Adaptations, image composition, camera settings and lighting can create a very distinctive artistic style.
As a little example I'd like to show two images made by two fellow 3D artists. The figures in both renders are wearing clothes made by me.
How do you create a 3D object?
With special software, depending on the stage the product is in.
The first step is Modelling.
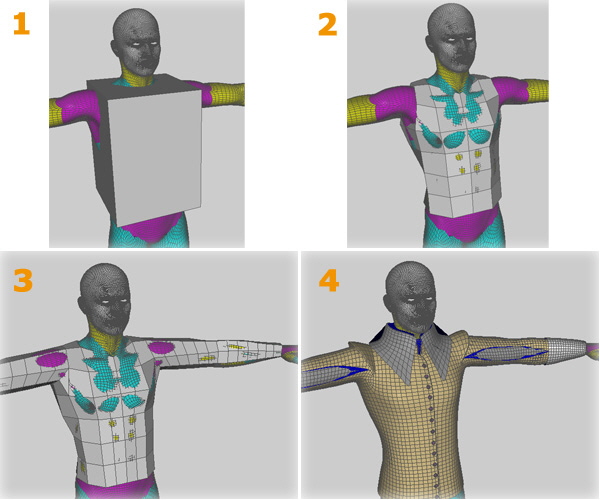
I usually start with a cube or a cylinder. Then I bevel the edges, extrude planes, subdivide the object until I have got the basic shape. Then I go on refining it, sometimes adding several layers, and in the end the geometry (shape) of the clothing item is finished.
In the second step the finished geometry gets UV-Mapping.
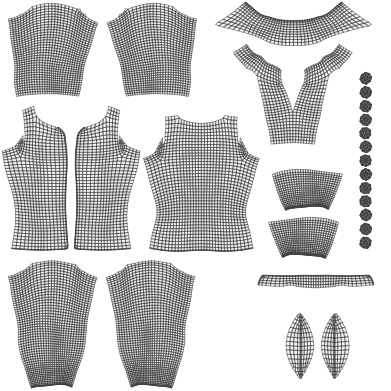
This process involves cutting and flattening the object's surface - a bit like peeling an orange. It serves to link each point of the 3D object to a specific point in a 2D image. That is absolutely necessary so that the clothing can take on colors and patterns later.
The final result of the mapping process is saved as a Template, it looks a bit like a sewing pattern for a 3D-Objekt.
The third step is Texturing.
When the UVmapping is done I can start creating textures for the objects. Textures are image files that are then assigned and processed inside the 3D software. As source materials I sometimes use computer generated images but mostly I use photos of real fabric, leather and lace.
I take these source materials and fit them onto the template.
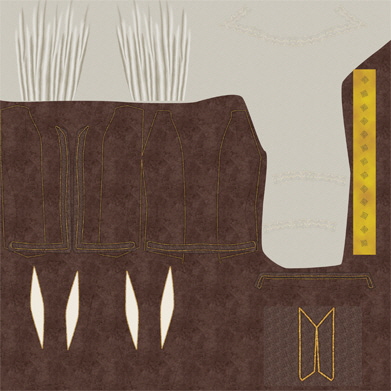
A texture set usually consists of a file for the color, a file for the structure, a file for the glossiness and probably another file for the transparency. Sometimes even more files are needed to control the application of special effects, like smooth glossy pearls on fluffy velvet.
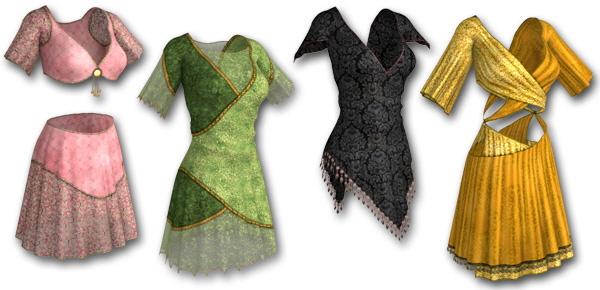
By assigning different textures I can give a piece of clothing completely different looks.
The following image shows the same dress with different textures:
Der vierte Schritt umfasst das Einstellen der Material-Eigenschaften.
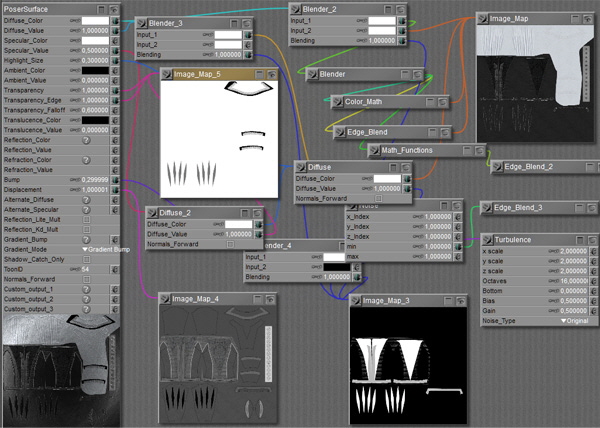
The texture files are linked to each other within Poser or DAZ Studio, so that the object gets color, structure and effects.
The finetuning of the material settings can be very time-consuming. Here is an example for a relatively complex material setting:
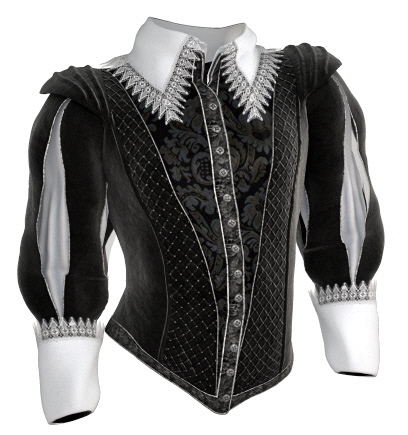
When I'm satisfied with the material setting I save it to the library, so the customers can easily load it and don't have to do all the work themselves.
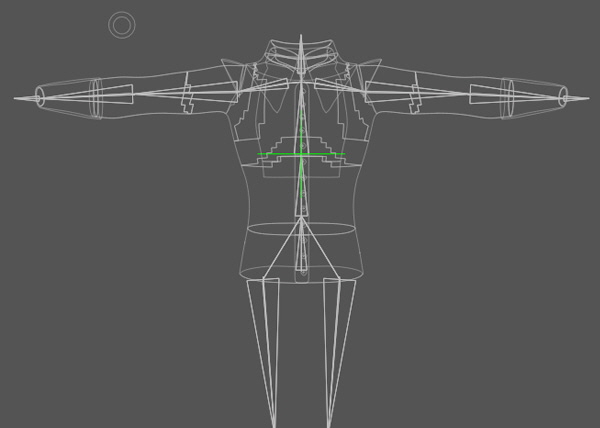
In the fifth step I add a skeleton to the clothing so it can move with the figure.
At modelling stage I have already set up groups that correspond with the body parts of the base figure. The base figure contains data that tells the software which body part can move how far in which direction, and how the shape changes in the movement. The bone skeleton with the movement data that is programmed to work with the figure is called "rigging". Now I load the rigging data into the clothing. But the clothing has a slightly different shape than the body, so I have to refine and adjust the rigging.
If the clothing has additional moveable parts like ribbons or veils, they get extra bones to make them poseable.
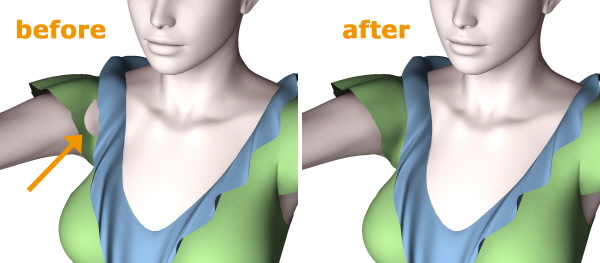
Sometimes I also have to code in additional shape changes (morphs), for example to make ruffles follow the shoulder movments in a natural way without distorting. These adjustments can be tied to the movement of certain body parts.
But this isn't all yet. Now we start with the sixth step which is creating Morphs.
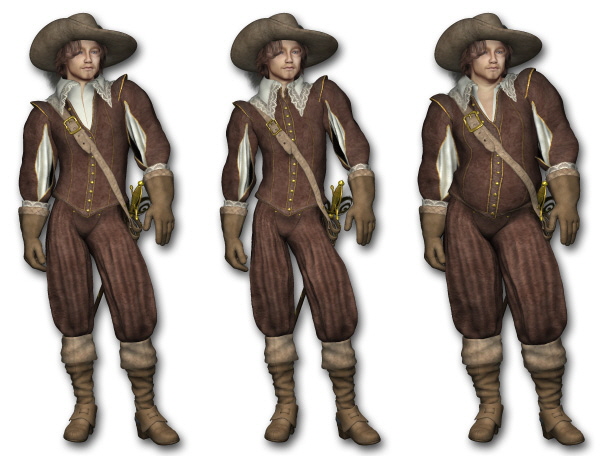
Most figures have "morphs", that means options to change the body shape. The clothing should be able to follow these changes. For this I use another software to drag the clothing wider or tighter so that it fits the various figure morphs. Usually I also add additional morphs, for example to make a skirt shorter or longer, to open a jacket or to make a veil billow in the wind.
The seventh and last step is packaging and promotion.
When the product is finished I have to create the preview icons for the library.
Then I can pack up all related files so that the product installs automatically to the right places in the users' libraries.
I also have to add a user guide, explaining how to best use the product.
Then I upload the zipped files to the shop where I want to sell that product. Now it has to go through Quality Assurance. When the testers find a problem I have to fix it and re-upload the product.
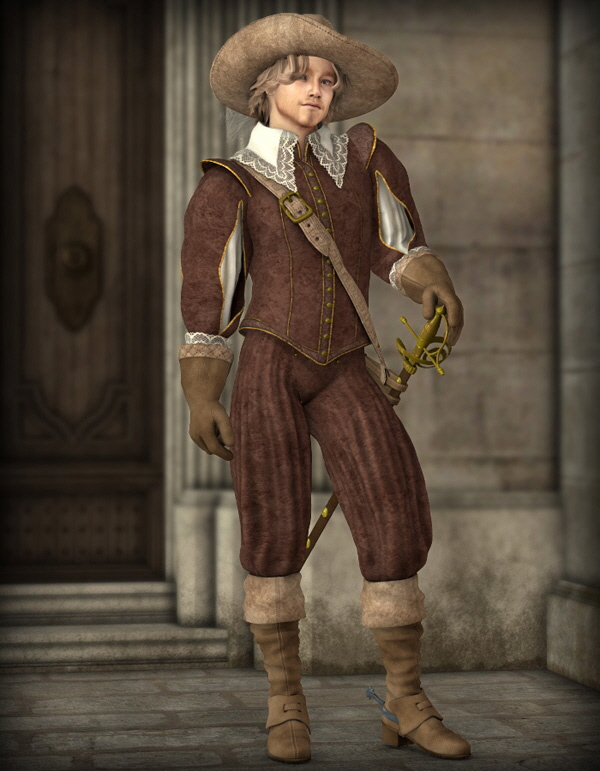
In the meantime I also do product renders, these are images that present my new piece of clothing in (hopefully) the best way, making the customers want to buy it and use it in their own images.
|


